Set up two-step authentication (2FA)
Before proceeding ensure you are signed in. If you need assistance to sign in, please read the sign-in chapter and then sign in to the required online service.
Step 1: Two-step authentication can be set up via the "Manage my account" function which is available from within the online service.
Click on the "Manage my account" option under your name, located in the top right corner.

Or, if you are a FuelWatch subscriber you can click on "Manage my account" after clicking on your name located in the top right corner.

Step 2: In the "Manage my account" page, click on the "Set up two-step authentication" link.
NOTE: This link will only be visible if two-step authentication is turned off. If two-step authentication is turned on then refer to the edit two-step authentication chapter to change the set-up of your two-step authentication.

Step 3: Please read the "Set up two-step authentication" page and then click the "Continue" button located bottom of the page.

Step 4: You should now see the "Choose authentication method" page.
Ensure you have your mobile device available.
Next, choose which authentication method you want to use:
- An authenticator app is the most secure of the available methods and is the recommended option.
However, you must have a smartphone or a device (tablet, iPad) capable of running the authenticator app.
If you do not already have an authenticator app installed on your device, you will be asked to install the authenticator app during the set-up process.
OR;
- You can elect to receive an SMS text to your mobile with a unique code that you enter when signing in.
Once you have decided on the authentication method you will use, select the required option and then click on the "Continue" button located at the bottom of the page.

Step 5: Enter your password and click on the "Continue" button.
If you have selected:

Step 6: You will now see the "Configure authenticator app" page.
Do you have an authenticator app installed on your mobile device?
If you do not, then you must install an authenticator app on your device now.
There are a number of authentication apps available on the market. You can find an authenticator app by going to the Google, Microsoft or Apple app stores and searching "authenticator app". Please select an app that is well-rated. We do not recommend one over the other.

Step 7: Once you have installed the authenticator app, use the authenticator app to scan the QR code on the page.
Step 8: Open your authenticator app to get the generated verification code.
Enter the code into the "Verification code" field and click on the "Verify code" button located underneath the "Verification code" field.
You will now be prompted to choose an account recovery method. Go to Step 14.
Step 9: You will now see the "Verify my mobile number" page:
- confirm the country code located in the first field is correct (assuming the customer is located in Australia, this field should display "Australia(+61)");
- enter your mobile number into the "Mobile number" field; and
- click on the "Send code" button located underneath the "Mobile number" field.
NOTE: If you have already supplied your mobile number, via "Edit personal details" (which can be found on the "Manage my account" page), then that mobile number will appear here. You can change the prefilled mobile number.

Step 10: You will now see the "Verify my mobile number" page requesting you enter a verification code.
REMINDER: You must keep this page open while checking your mobile device.

Step 11: Check your mobile device for a six (6) digit verification code.
REMEMBER: It can take several minutes for an SMS to be delivered.

If you did not receive the SMS:
- Make sure you have entered the correct mobile number for the SMS. If the wrong mobile number was entered, clear the mobile number field, enter the correct number and click on the "Send code" button again.
- Check your network is available.
- If there is still no SMS, get a new verification code by clicking on the "Get new code" button, however note that any previous verification code(s) sent will no longer work.
Step 12: Enter your six (6) digit verification code into the "Verification code" field, and then click on the "Verify code" button.

Should you receive an error message, such as "The specified verification session is invalid or may have expired", then:
- Click on the "Get new code" button, located to the right of the "Verify code" button.
- Another text message will be sent to your mobile device. Ignore any previous codes sent and enter this new code into the "Verification code" field; and
- Click on the "Verify code" button.
Step 13: You will now see the "Verify my mobile number" page with your correct mobile number displayed in the "Mobile number" field.
Confirm the supplied mobile number is correct, and save it by clicking on the "Continue" button.
- Clicking on the "Back" button will enable you to go back and change your mobile number.
You will now be prompted to choose an account recovery method. Go to Step 14.
Step 14: You will now see the "Choose a recovery method" page.
A recovery method enables you to access your account in the event you lose your mobile phone (or other authenticated device). It ensures that in the event of a lost or non-functional device, you can go through a simple yet secure process to recover your account.
Select your recovery method by clicking on the radio button for either:
- "via a secondary email address"; or
- "via recovery codes"; and
Click on the "Continue" button located at the bottom of the page.

If you have selected:
Step 15: Enter your secondary email address into the "Recovery email" field and click on the "Send code" button, located at the bottom of the page.

Step 16: You will now see the "Verify recovery email" page requesting you enter a verification code.
REMINDER: You must keep this page open while checking your recovery email.
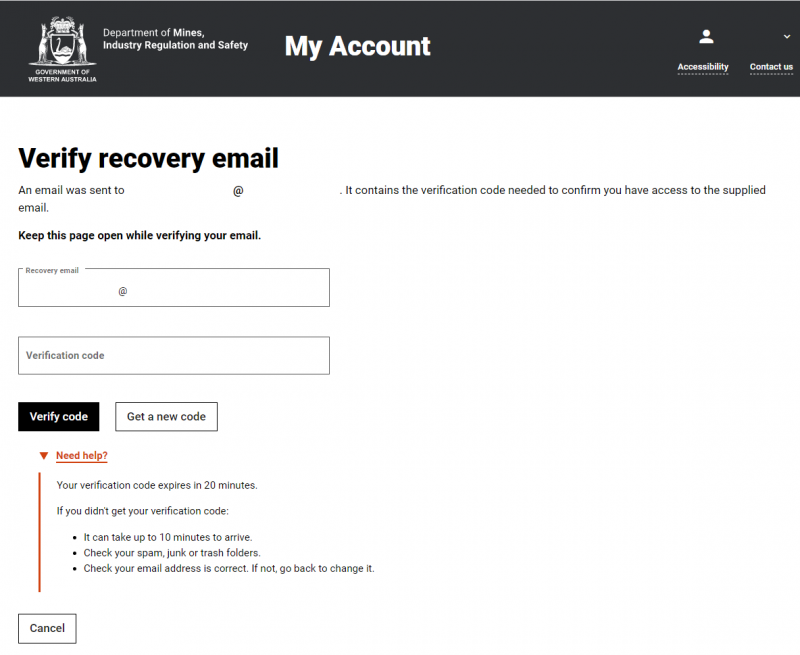
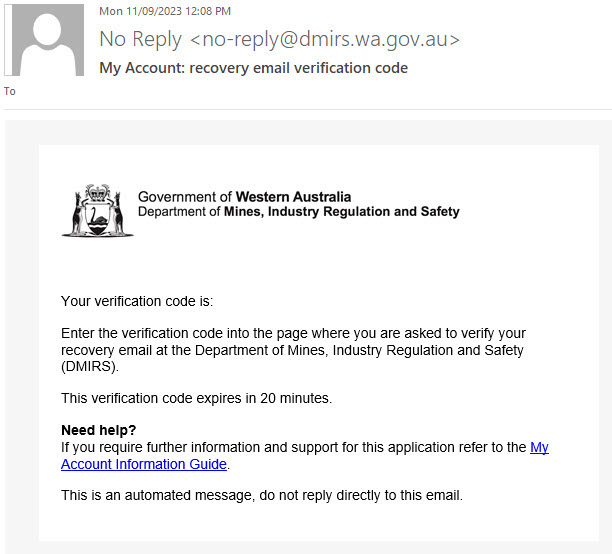
Step 17: Check your secondary email address and confirm you have received an email titled "recovery email verification code".
REMEMBER: It can take up to 10 minutes for the email to be delivered.
If you did not receive the email:
- Make sure the correct email address was entered. If the wrong email address was entered, clear the email field, enter the correct email and click on the "Send code" button again.
- Check your Junk, Spam or Trash folders.
- Confirm that you are looking at the secondary email inbox.
- If there is still no email, get a new verification code by clicking on the "Get new code" button, however, note that any previous verification code(s) sent will no longer work.
- If, after 20 minutes the email still has not been received, there may be a technical issue. In this instance, please contact us for further assistance. Contact details can be found in the Need further assistance? chapter.
Step 18: Enter the verification code you received in your email and click on the "Verify code" button.
NOTE: You have 20 minutes from when the email was sent, to enter the verification code and click on the "Verify code" button.
Should you cut and paste the verification code directly from your email via the double-click function, make sure that you have not pasted any extra spaces before or after the code.
If the verification code has expired, please click on the "Get new code" button.
Continue to Step 21.
Step 19: Click on the "Download" button and save the recovery codes in an accessible location.

NOTE: For security reasons, once you continue, the recovery codes cannot be downloaded a second time. You MUST save or print a copy and store it in a safe location.
Step 20: Once downloaded and saved, click on the "I have saved my recovery codes" checkbox, and then click on the "Continue" button, located underneath the checkbox.
Next, continue to Step 21.
Step 21: You will now be directed to the "Thank you" page, confirming that two-step authentication has now been set up. Click on the "Continue" button.

You will also receive an email titled "two-step authentication set up completed".

Step 22: You will be returned to the "Manage my account" page. You can verify the status of your two-step authentication on this page.
From here you can click on the "Back to" button, located at the top of the "Manage my account" page. This will return you to the online service.
If you are unsure about the two-step authentication process, sign out and then sign back in again. Upon signing into the online service you will go through the two-step authentication process.